Arduino - Accelerometer ADXL335
The
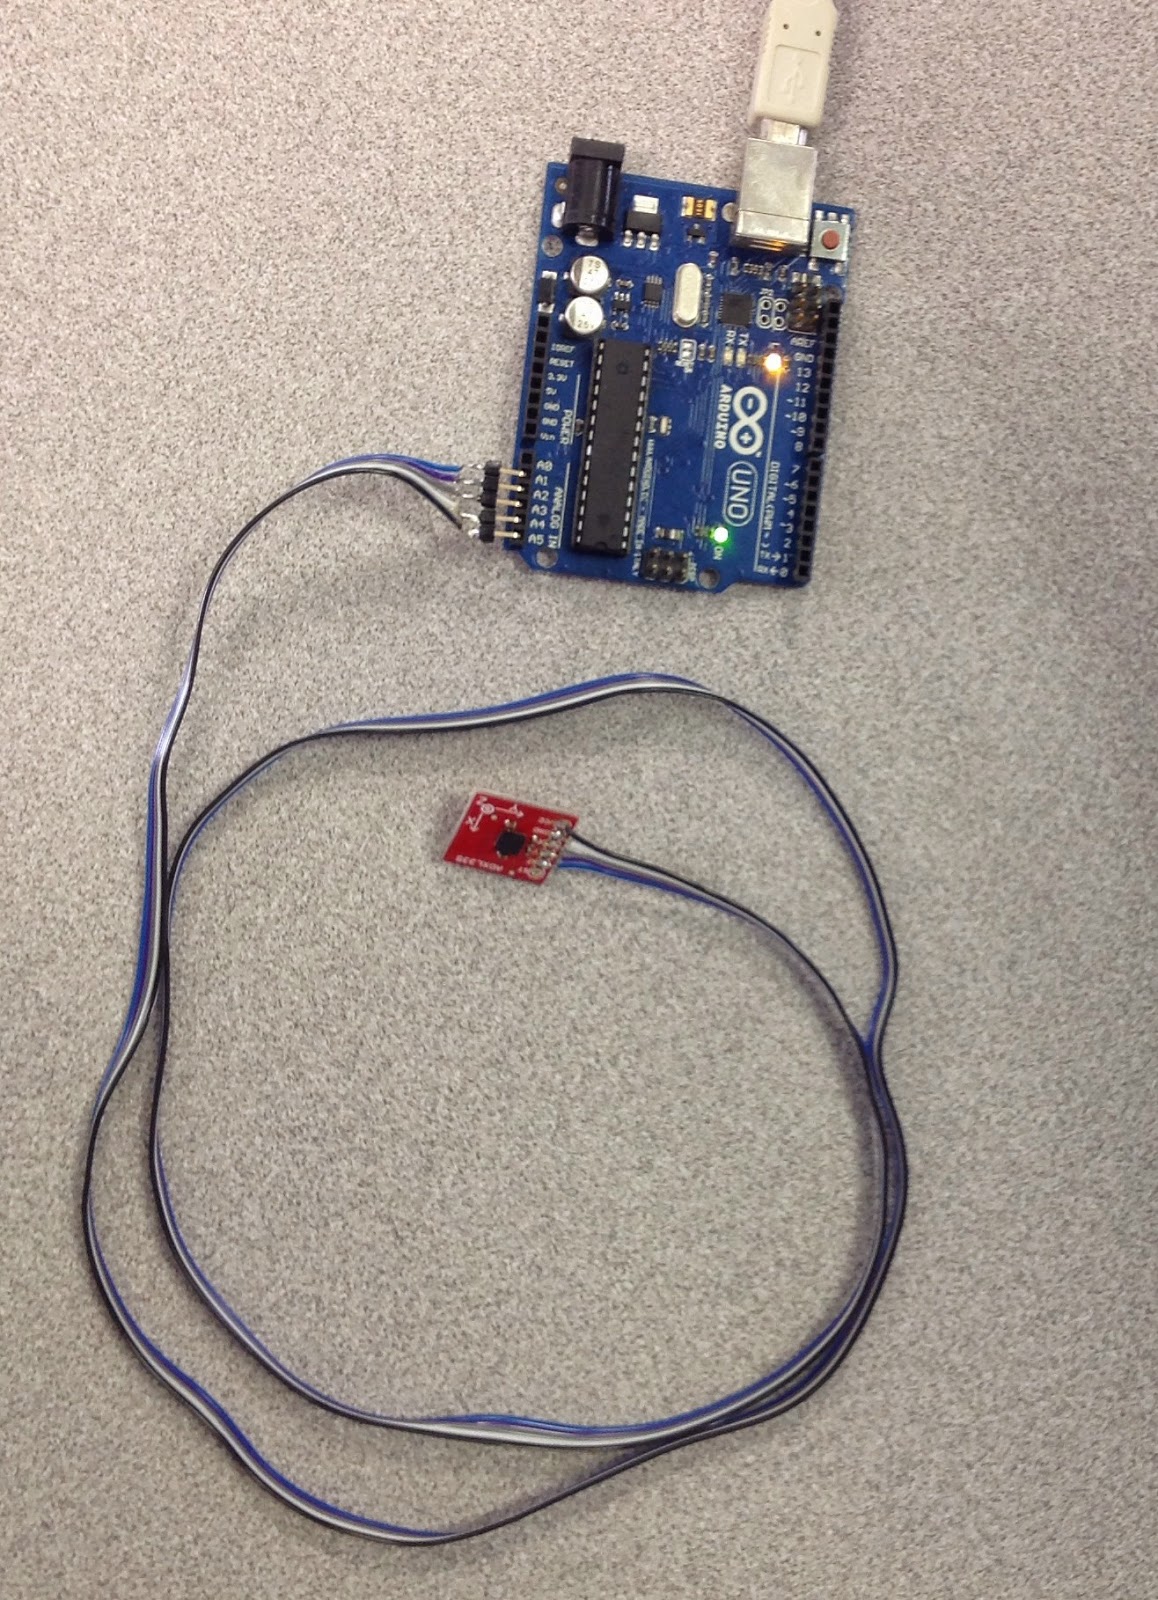
accelerometer is an analog device used to measure the proper acceleration in
the three different axis(x-y-z).

Wiring:
1. Connect the VCC to A5.
2. Connect the GND to A4.
3. Connect "X" to A3 analogpin.
4. Connect "Y" to A2 analogpin.
5. Connect "Z" to A1 analogpin.

Code:
//Analog read pins
void loop(){

const int groundpin =
18;
const int powerpin =
19;
const int xPin = A3;
const int yPin = A2;
const int zPin = A1;
void setup(){
Serial.begin(9600);
//analog to gnd &
5v
pinMode(groundpin,OUTPUT);
pinMode(powerpin,OUTPUT);
digitalWrite(groundpin,LOW);
digitalWrite(powerpin,HIGH);
pinMode(xPin, INPUT);
pinMode(yPin, INPUT);
pinMode(zPin, INPUT);
}
int x = analogRead(xPin);
//
//add a small delay between pin readings. I read that you should
//do this but haven't tested the importance
delay(1);
//
int y = analogRead(yPin);
//
//add a small delay between pin readings. I read that you should
//do this but haven't tested the importance
delay(1);
//
int z = analogRead(zPin);
//
//zero_G is the reading we expect from the
sensor when it detects
//no acceleration. Subtract this value from the sensor reading
to
//get a shifted sensor reading.
float zero_G = 512.0;
//
//scale is the number of units we expect the
sensor reading to
//change when the acceleration along an axis
changes by 1G.
//Divide the shifted sensor reading by scale
to get acceleration in Gs.
float scale = 102.3;
//
Serial.print("x: ");
Serial.print(((float)x - zero_G)/scale);
Serial.print("\t");
//
Serial.print(" | y: ");
Serial.print(((float)y - zero_G)/scale);
Serial.print("\t");
//
Serial.print(" | z: ");
Serial.print(((float)z - zero_G)/scale);
Serial.print("\n");
delay(100);//just here to slow down the
serial output - Easier to read
}
Serial print display
Acelerometro ADXL335
El acelerometro es un dispositivo análogo utilizado para medir la acceleración propia en los tres differentes ejes(x-y-z).

Materiales:
Cableado:
1. Conecte el VCC a 5V.
2. Conecte el GND a A4.
3. Conecte "X'' al puerto análogo A3.
4. Conecte "Y" al puerto análogo A2.
5. Conecte ''Z" al puerto análogo A1.

1. Conecte el VCC a 5V.
2. Conecte el GND a A4.
3. Conecte "X'' al puerto análogo A3.
4. Conecte "Y" al puerto análogo A2.
5. Conecte ''Z" al puerto análogo A1.
Código:
//Analog read pins
const int groundpin = 18;
void setup(){
//analog to gnd & 5v
void loop(){
int x = analogRead(xPin);
delay(100);//just here to slow down the serial output - Easier to read
const int groundpin = 18;
const int powerpin = 19;
const int xPin = A3;
const int yPin = A2;
const int zPin = A1;
void setup(){
Serial.begin(9600);
//analog to gnd & 5v
pinMode(groundpin,OUTPUT);
pinMode(powerpin,OUTPUT);
digitalWrite(groundpin,LOW);
digitalWrite(powerpin,HIGH);
pinMode(xPin, INPUT);
pinMode(yPin, INPUT);
pinMode(zPin, INPUT);
}
int x = analogRead(xPin);
//
//add a small delay between pin readings. I read that you should
//do this but haven't tested the importance
delay(1);
//
int y = analogRead(yPin);
//
//add a small delay between pin readings. I read that you should
//do this but haven't tested the importance
delay(1);
//
int z = analogRead(zPin);
//
//zero_G is the reading we expect from the sensor when it detects
//no acceleration. Subtract this value from the sensor reading to
//get a shifted sensor reading.
float zero_G = 512.0;
//
//scale is the number of units we expect the sensor reading to
//change when the acceleration along an axis changes by 1G.
//Divide the shifted sensor reading by scale to get acceleration in Gs.
float scale = 102.3;
//
Serial.print("x: ");
Serial.print(((float)x - zero_G)/scale);
Serial.print("\t");
//
Serial.print(" | y: ");
Serial.print(((float)y - zero_G)/scale);
Serial.print("\t");
//
Serial.print(" | z: ");
Serial.print(((float)z - zero_G)/scale);
Serial.print("\n");
delay(100);//just here to slow down the serial output - Easier to read
}
No hay comentarios:
Publicar un comentario